Cloud first, mobile first, right? But what will I do with the data that lives on my machine, but I don’t want to (or cannot) sync with OneDrive? I need to backup that data!
Well, you can. The Azure team recently announced the posibility of backing up your Windows 10 machine to Azure! Sounds cool? I sure do think so. So let’s check that out. 🙂
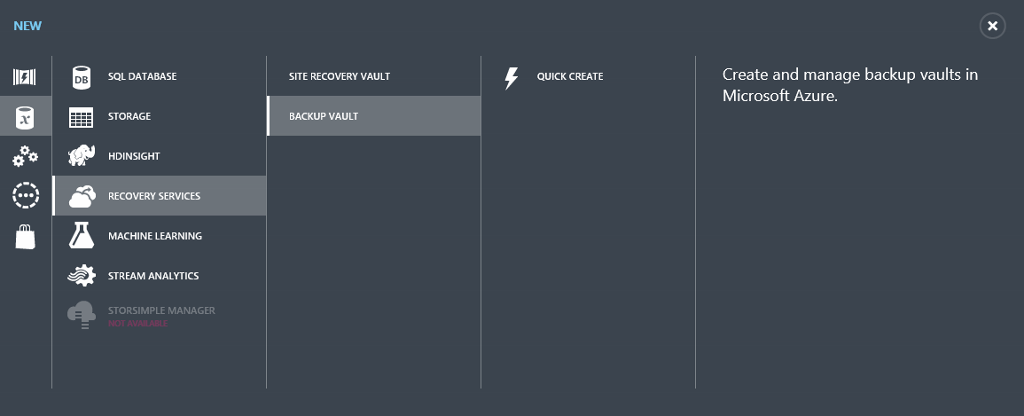
First of all, we sign in to the Azure Management Portal to make sure we have a place to backup those important file-folder data. Backup data is stored in a Backup Vault, so we navigate to new -> data services -> recovery services -> backup vault and hit the ‘quick create’ button.
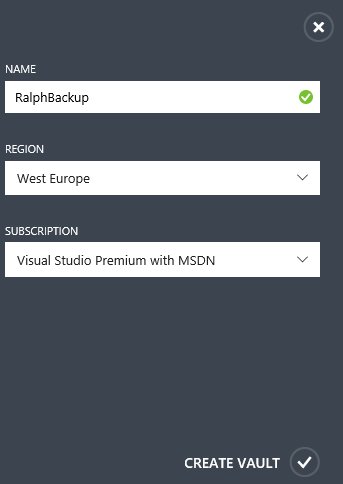
The only things we need to specify is the name for the vault, the location to store the data and the subscription we wish to use for billing.
Remember: Location, Location, Location! In the mindset of Azure, Northern Europe is the UK/Dublin datacenter, while Western Europe is the Amsterdam datacenter. All those maps showing that Amsterdam is more north than Dublin are wrong, people! 😉
Anyway, we hit the ‘create vault’ button and the vault will be created. This can take some time, you can ofcourse check the status by monitoring the notifications on the bottom of the portal.


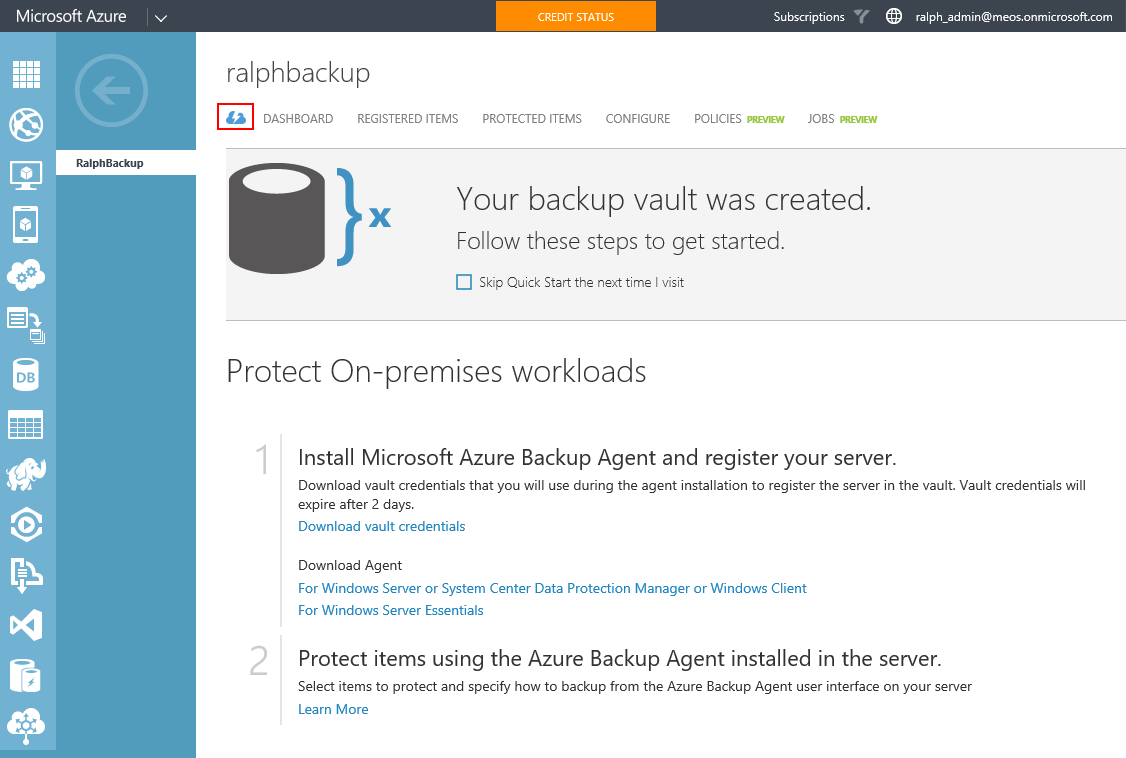
Once the vault has been created, the portal will tell us so. We can find the newly created vault on the ‘recovery services’ tab in the Azure portal.
Right after you created the vault you can check the storage redundancy options on the configuration. This would the best moment to do so. Once an item has been registered to the vault, the storage redundancy option is locked and you can no longer modify it!
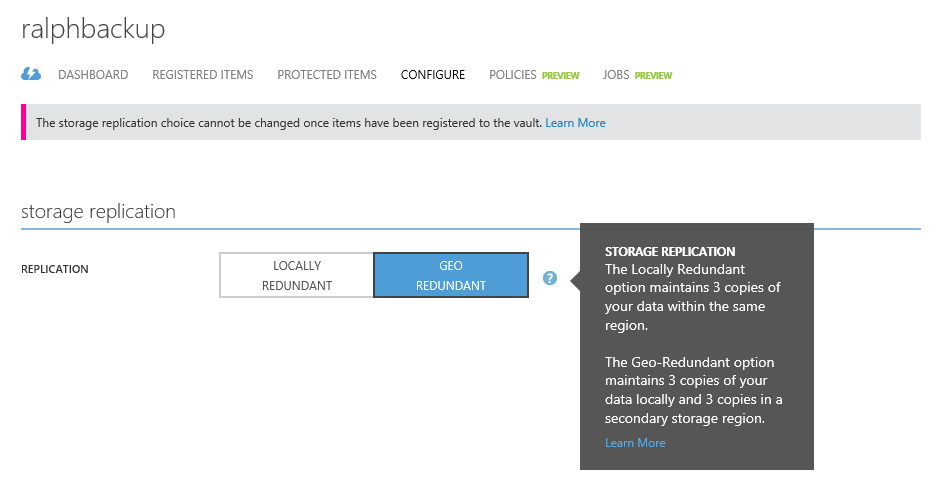
You should evaluate your business needs when choosing the best replication setting. If you plan to use it as your primary backup endpoint, you should consider using the geo-redundant option. That way, you’ll have six copies of your data. It’s replicated three times on the primary storage region, and three times in a secondary region. That way your data will be durable in two seperate regions.
The localy redundant storage maintains just the three copies on the primary region, within a single facility. That way, LRS protects your data from normal hardware failure, but not from the failure of an entire Azure facility. If you are not using Azure as your primary backup endpoint, you can go with the LRS option to save on the cost of the storage.
Once we decided on the way to replicate our data en choose the according setting, we can go ahead and download the vault credentials. These will be used to authenticate the backup source to the backup vault.
The vault credentail file is downloaded through a secure channel from the Azure portal. To do this, go to the ‘quick start’ view of the backup vault you just created.
Now, it’s time to set up the agent on each of the machines you want to protect. You can download the agent from the same window that you used to download the vault credentials file. Once the agent has finished downloading, simply run it to start the installation.
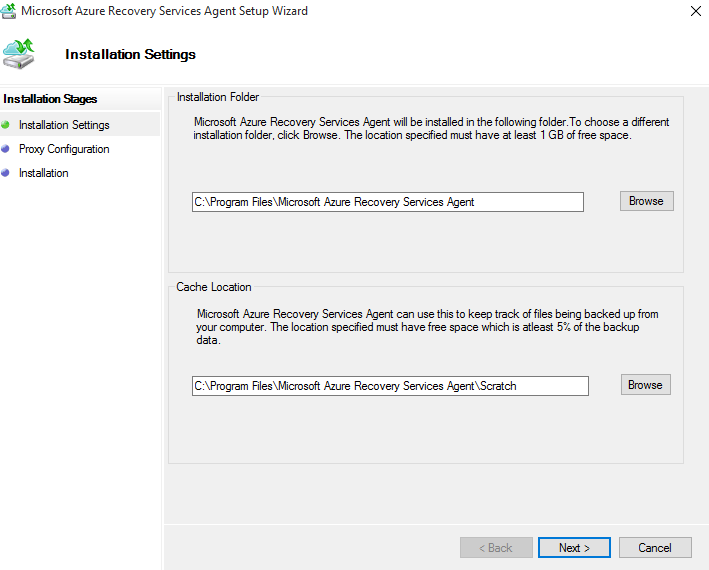
First, we have to specify the necassery file paths. You could just ‘next’ this page, but if you’re going to backup a lot of data or have a small system partition, it could be wise to change the cache-path.
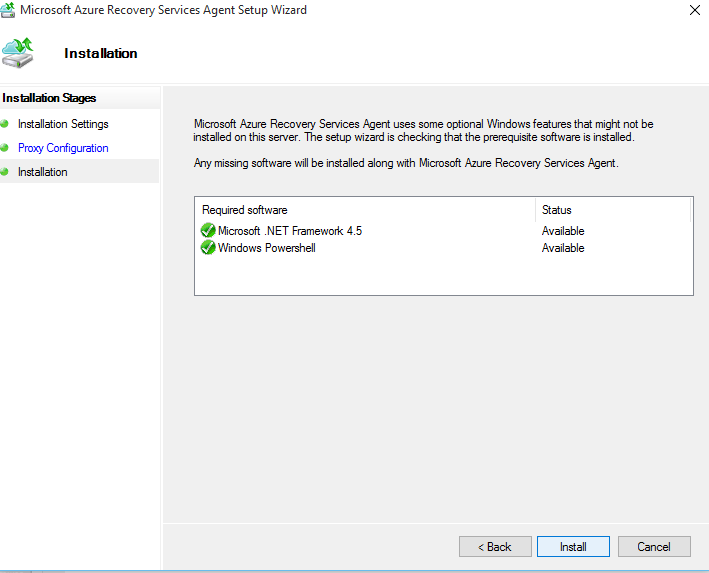
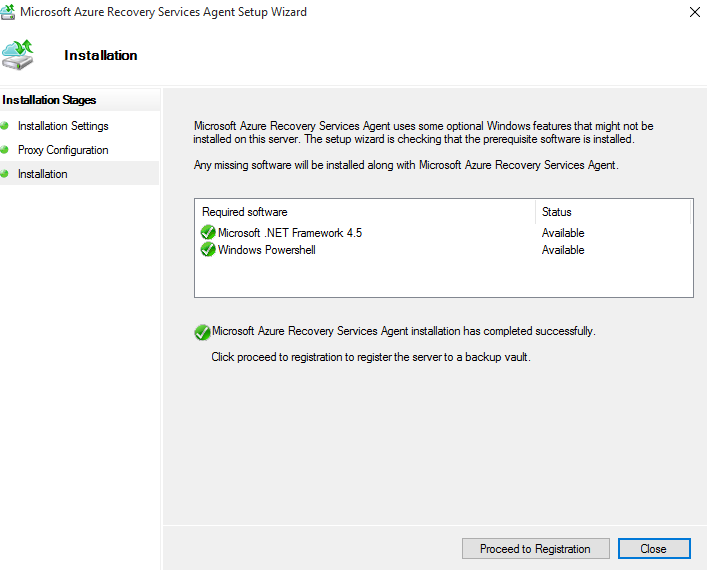
After setting proxy-settings (when necassery) and checking some prerequisites, we can start the installation. Once the installation has completed, click the ‘proceed to registration’ button to continue with setting up the configuration.
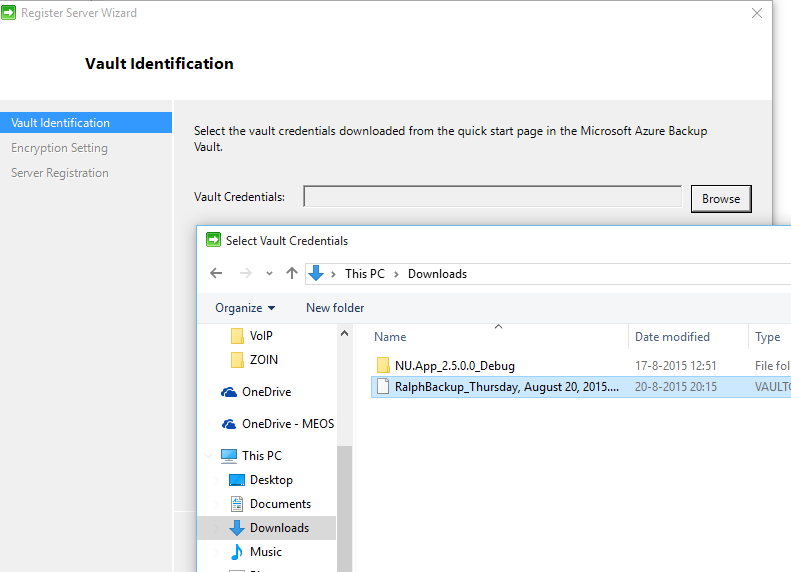
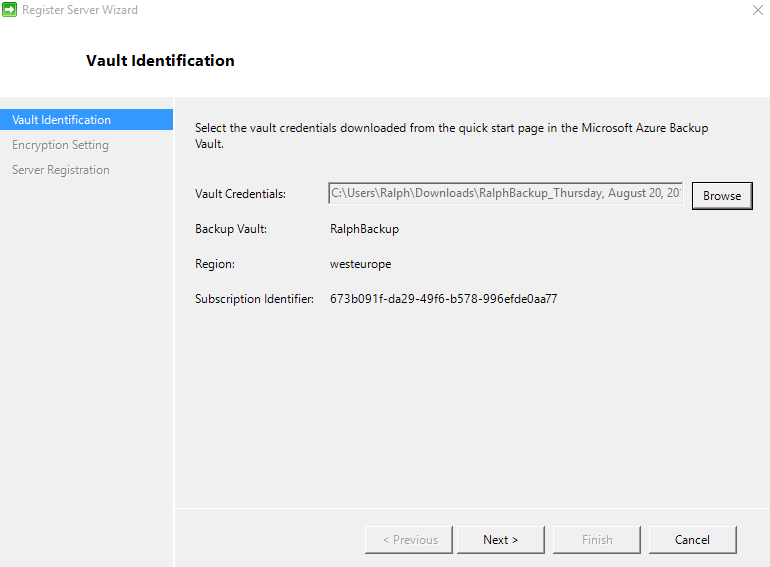
Click the ‘browse’ button and navigate to the vault credentials file you downloaded earlier. The file will be validated and we can continue to the next step.
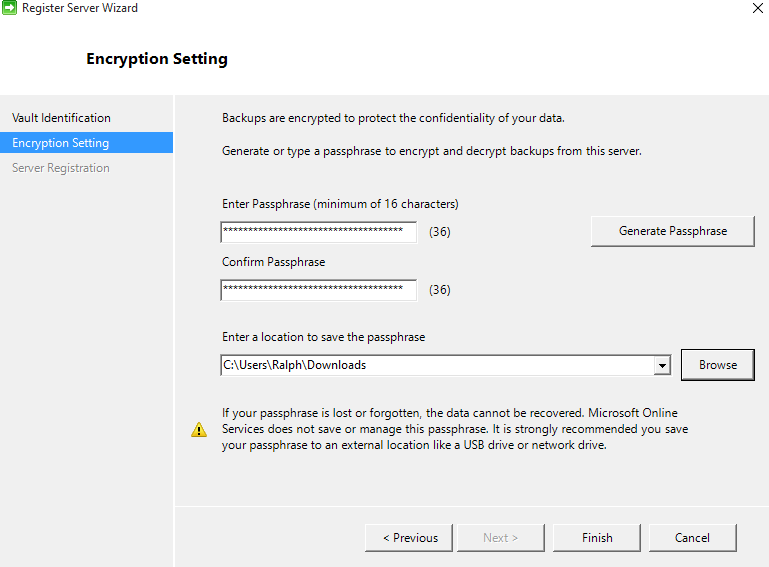
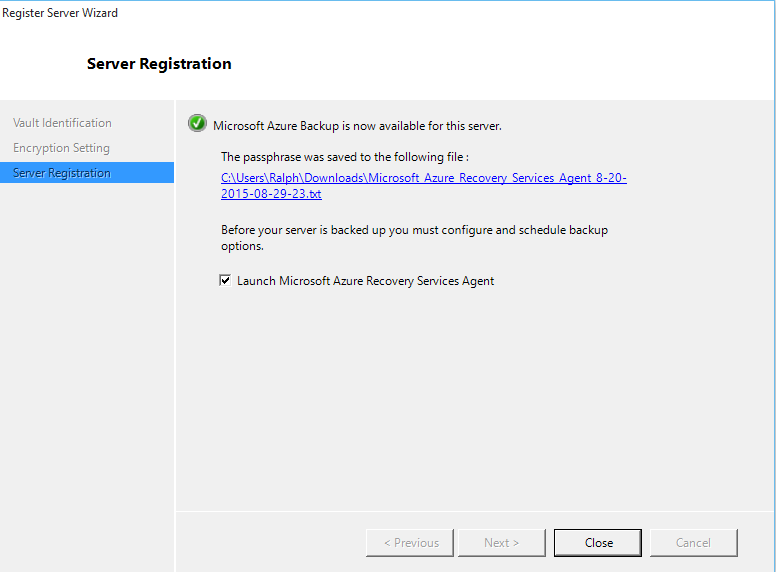
Your backup will be encrypted using a passphrase. You can type your own passphrase, or have the software generate one for you. The passphrase will be stored in the location that you specify so that you can retrieve it later. It’s wise to store this passphrase on a separate location, for example on a USB-thumbdrive. Without the passphrase, you won’t be able to get access to your data! Once done, the server will be registrered and you can launch the agent.

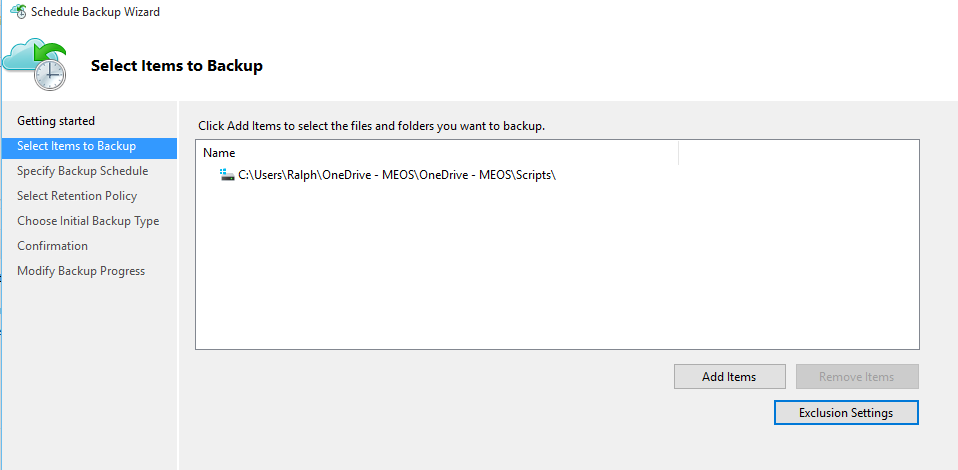
The wizard is nice and easy. Select the files or folders you want backed up, and specify any exclusions if you’d like.
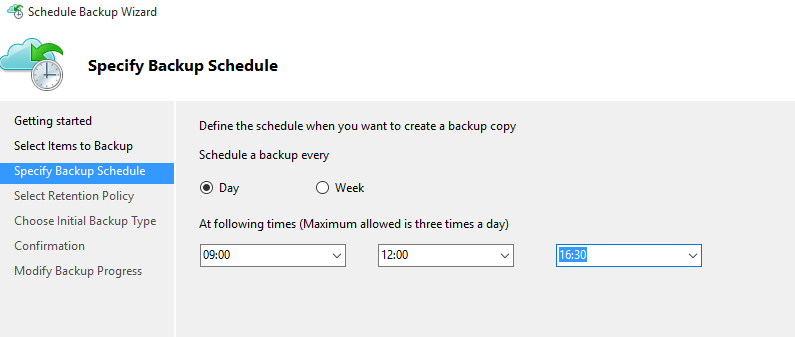
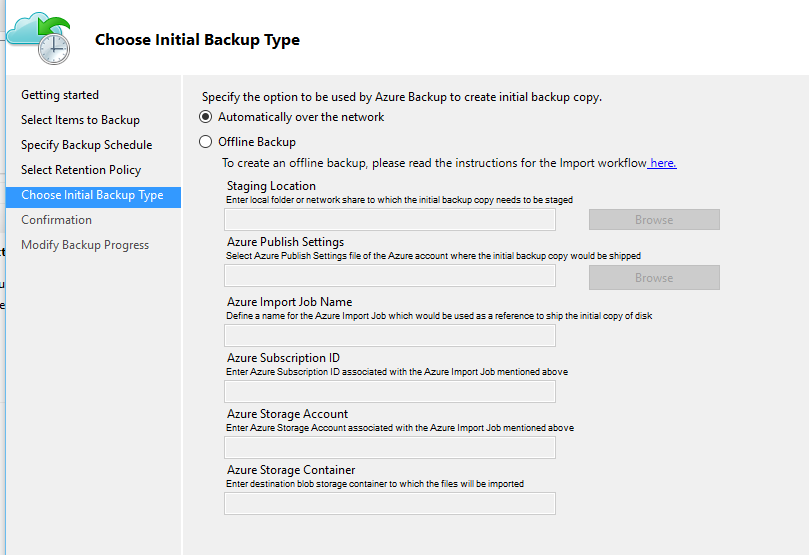
You can specify when to perform a backup, with a maximum of three times a day. If you have lots of data to backup, you might want to seed the backup by shipping a disk to the nearest Azure datacentre.

And that’s it! Once the process completes, go back to the actions pane and click the ‘backup now’ button to complete the initial seeding. This will start the initital backup. You can close this window if you want, it will run in the background. That’s it! Your precious data is now protected by a backup to Azure. In one of my next blog posts, I will run through the steps of restoring your data from the backup when needed. Stay tuned!